As I said in my last post, I have been in somewhat of a creative slump and I really struggled with a couple of these layouts.
I've had the photos for this first layout in the "to scrap" box for a few years and just never felt any inspiration to scrap them. I don't feel that this is one of my better layouts but I'm happy to have the pictures out of the box and onto a layout.
I actually dug my sewing machine out of the closet for this page--I don't think that machine has been out of the box in about 20 years! I was never very good at sewing anyway, hence the reason the machine has been in the closet for 20 years lol. But I spent a couple hours cleaning it up and trying to remember how to thread the crazy thing and was finally able to produce a usable stitch. My motivation in using the machine was the fact that it takes so long to stitch around the border of a layout by hand. And since a straight stitch is the only stitch I'm even remotely proficient in (using the term "proficient" may be a slight stretch lol), I had high hopes. I'm still learning but it was faster than hand stitching and I'm satisfied with the result of the machine sewing.
 |
| The "tickets" on the far left are actually pictures I took of the actual tickets. I just had them printed and cut them out. The ticket at the bottom is actually one of the tickets. I can't recall which one of the boys brought it home. I also used vellum for the first time in AGES! And you can't tell but I also used Goosebumps texture spray on this layout. |
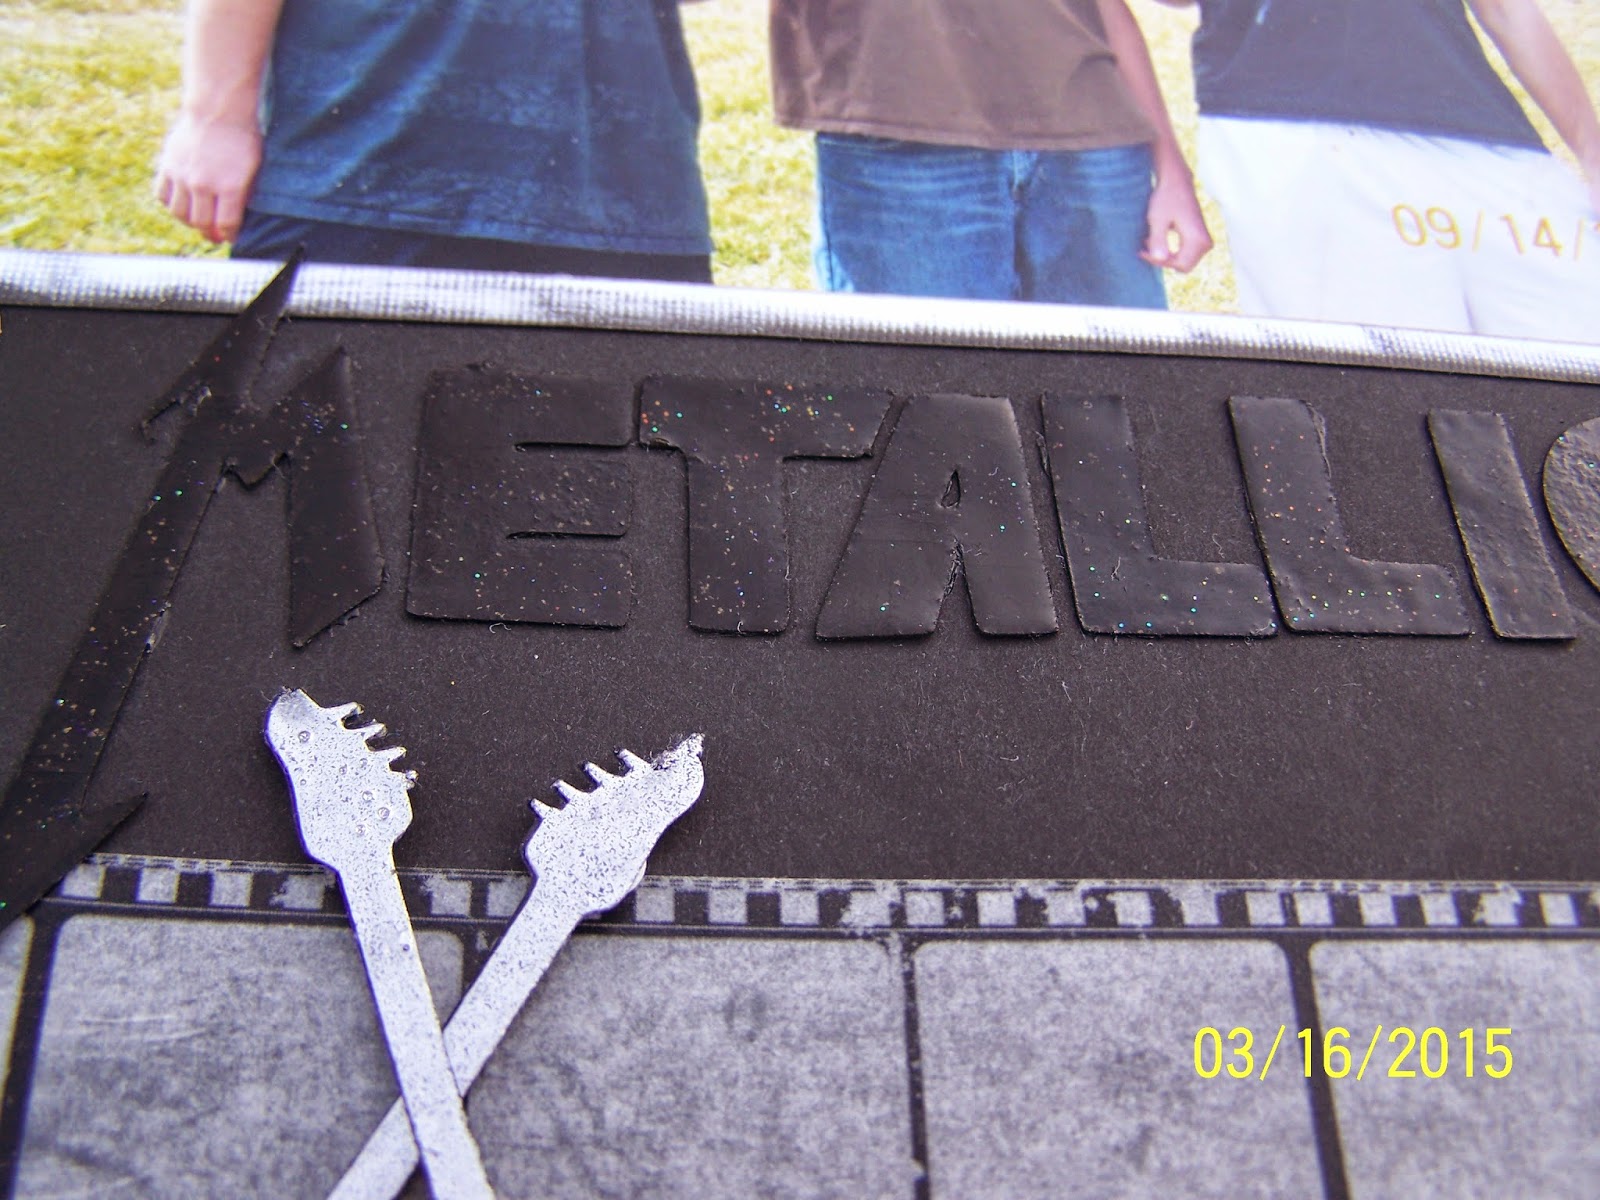 |
| I cut the title using my SCAL2 software and my Expression. I then heat embossed with black embossing powder. After the third layer of embossing I flicked some Ranger diamond glitter onto the letters and then reheated each letter. If you click on the photo you can see the pretty sparkle to the letters. |
 |
| I used the same technique here as with the title. Sadly, I have no idea what this symbol really is or what it means LOL. It came up over and over again when I did a Google search for "Metallica symbol" so I figured it'd work--Especially considering I'm not a Metallica fan and was completely clueless as to how to embellish this page. |
 |
| I cut the guitars with the SCAL2 as well. I cut two layers and cut the bottom layer as a solid piece so that the black would show through. I then heat embossed the top layer with silver embossing powder. These really turned out well. |
In the process of using my older supplies I have rekindled my love of embossing. It's one of those things that simply fascinated me in the beginning of my scrapbook obsession but that fell by the wayside somewhere along the way. For awhile I'd still use embossing when making cards but eventually, even that sputtered to an end (as did my card making lol). But over the last couple weeks I've purchased several new colors of embossing powder and I'm hoping to keep the love alive for a good long while. So much versatility in those little bottles of powdery yumminess!
But, moving along---this next layout is another that I struggled with and to be honest, I'm really not happy with, but unless some lightning bolt of creativity hits me then I'm calling it finished.
 |
| nothing spectacular here, but it's a memory preserved. |
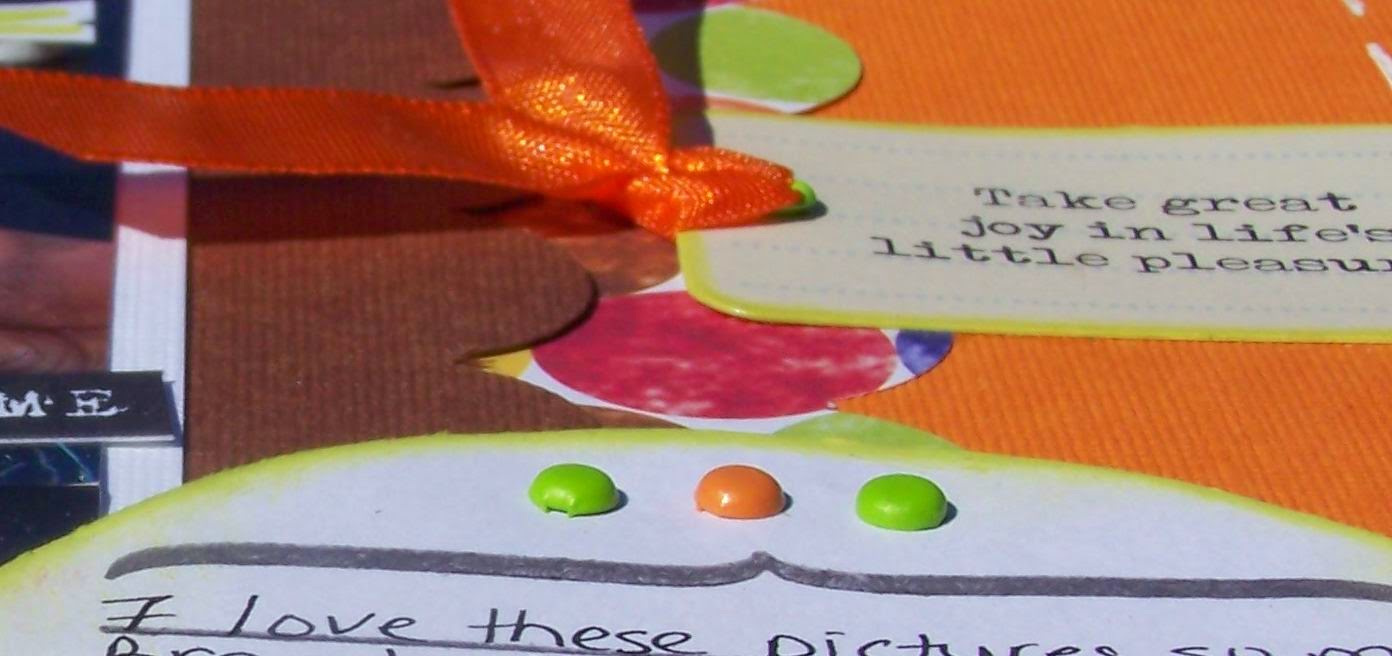 |
| Brads are another supply I have an abundance of but rarely use... I'm making a concerted effort to use them more often. And why wouldn't I??? Those things are great! |

And here is my 3rd layout...which I also struggled with. Actually, I felt as though I failed to do justice to the photo which I absolutely love beyond words of my husband and our granddaughter taken this past 4th of July. Looking at it now, I would say that I'm more satisfied rather than happy with the end result. This page felt forced from the get-go and I have no idea why. Unfortunately, the harder I tried the more forced it felt. I reached a point with this particular layout where it felt more like a chore than something I do because I love it...it's suppose to relieve my stress not create it. Eventually, I was tired of looking at it on my desk and called it done.
 |
| *first let me say that the red paper with the blue stars is actually STRAIGHT even though the way the photo is cropped causes it to appear very crooked. I used the paintbrush paint splatter method for this page. Plain red and blue acrylic paint mixed with a little water to thin each one. Just dip your toothbrush into the paint, hold it close to your paper toward the direction you want the paint to splatter and pull your finger firmly from the front of the toothbrush to the back, allowing the paint to splatter across the paper. This is not a precise process so be sure and protect your clothing as well as anything around where you're splattering the paint. |
 |
| For the title I used my SCAL2 software and my Cricut Expression 2. I also created a handsewn border around the edge of the white paint splattered cardstock. |
 |
| I created this little "Uncle Sam" paper piecing from an image I found online. He's pretty cute, even if I do say so myself lol. And the stickles were just the perfect touch :) |
 |
| I used a sparkly embossing powder on the stars...and then popdotted them on. The Pinwheels are by Pebble and I got those from sb.com. I had originally planned on making my own pinwheels but when I saw these for such a great price I had to get them. I added some diamond stickles to the small stars on the pinwheels. |
 |
| A few sequins scattered about are my new go-to embellishment and I love them on this layout in particular. |
I used a brand spanking new (to me) technique and I love the effect! I got some
texture paste a few months back with the intent of using it on a canvas I want to paint for my bedroom. But when I saw it being used on scrapbook layouts I knew I had to give it a go. I used a Tim Holtz stencil...I can't remember the name but possible fading circles or dots?? Anyway, the paste works like a dream and dries quickly. I sprayed some red Maya Road mist directly onto the dried paste as well as some diluted teal acrylic paint I dropped onto the page. Love, Love, LOVE this stuff and I will definitely be using more of it!
 |
| Just how incredible adorable is this little cutie??? |
 |
| Here you can see more of the effect of using the texture paste directly on the paper. It really is fabulous--if you don't have any, GET SOME, lol. |
 |
| This is actually also texture paste. I used a stencil embellishment to create the "love you" here and once dry I added some stickles for a little touch of sparkle. |
 |
| doilie from the Dollar store and some misc. embellishments. I covered the wood veneer "perfect" chat bubble with acrylic paint to match the layout. |
 |
| And the title as usual was cut with SCAL2 and my Expression2. |
I realize this probably seems like the post that was never going to end lol, and I apologize if I've rambled. That's all I have to share for today but I came across a sketch in the scrapbook.com gallery I'm dying to try my hand at so be sure you check back soon!
If you made it this far through this post, then THANK YOU! Have a great day and happy scrapping!
Rhonda
I adore your layouts, I can only imagine them if you were actually happy with them! Hoping to get some of your scrappin mojo flowin for myself soon.
ReplyDeleteDana, you are far too kind. I think I'm too guilty of comparing my layouts to others' and feel that I come up lacking. I'm working on it :) Thank you for being a faithful reader :) <3 <3 <3
ReplyDelete