Tuesday, March 31, 2015

Spring break scrapping

I promised a couple layouts and I'm here to deliver :) It's rare...very rare, for me to start AND finish a layout in one day. I normally just have too many distractions and it takes me 2-3 days, or sometimes more, to complete a layout. But yesterday, luck was on my side and I finished late last night. I debated waiting until later in the week after I'd done at least one more but decided against it.
So here we are :)

I really struggled getting good pictures of these layouts for some reason. I just couldn't get them photographed well enough to crop them straight...it's very frustrating but hopefully it won't distract too much for the layouts themselves.

I really had trouble with this first layout...it took several days. It just made a bed on my desk and refused to cooperate when I said it was time to move on. Eventually, I reached the point that I said enough was enough and called it done...layout: EVICTED...lol.


Could NOT get this one straight no matter how much I
cropped.  Nothing special about this one as far as the scrapbook
process...pretty basic, actually. But of course if you have any
questions you can leave me a comment :)
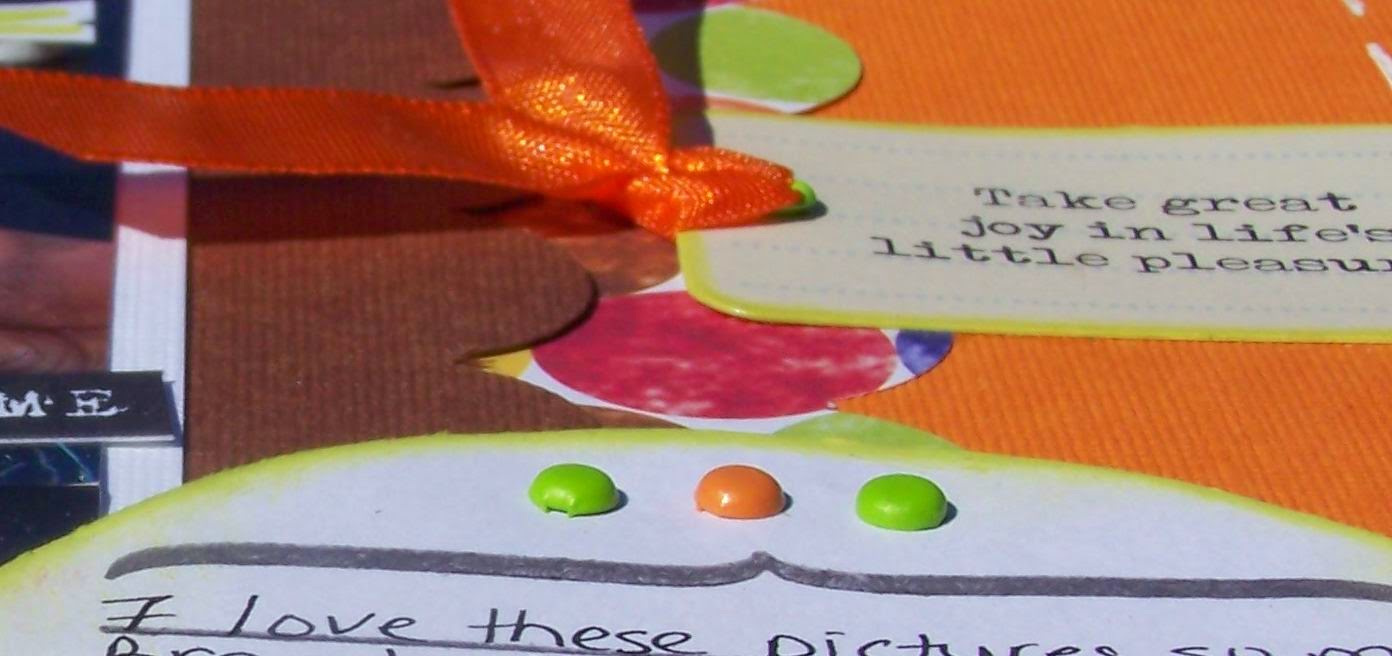
brads in the title to add some dimension...black and white
bakers twine for the same purpose. Also some pop dots underneath
some of the stars.


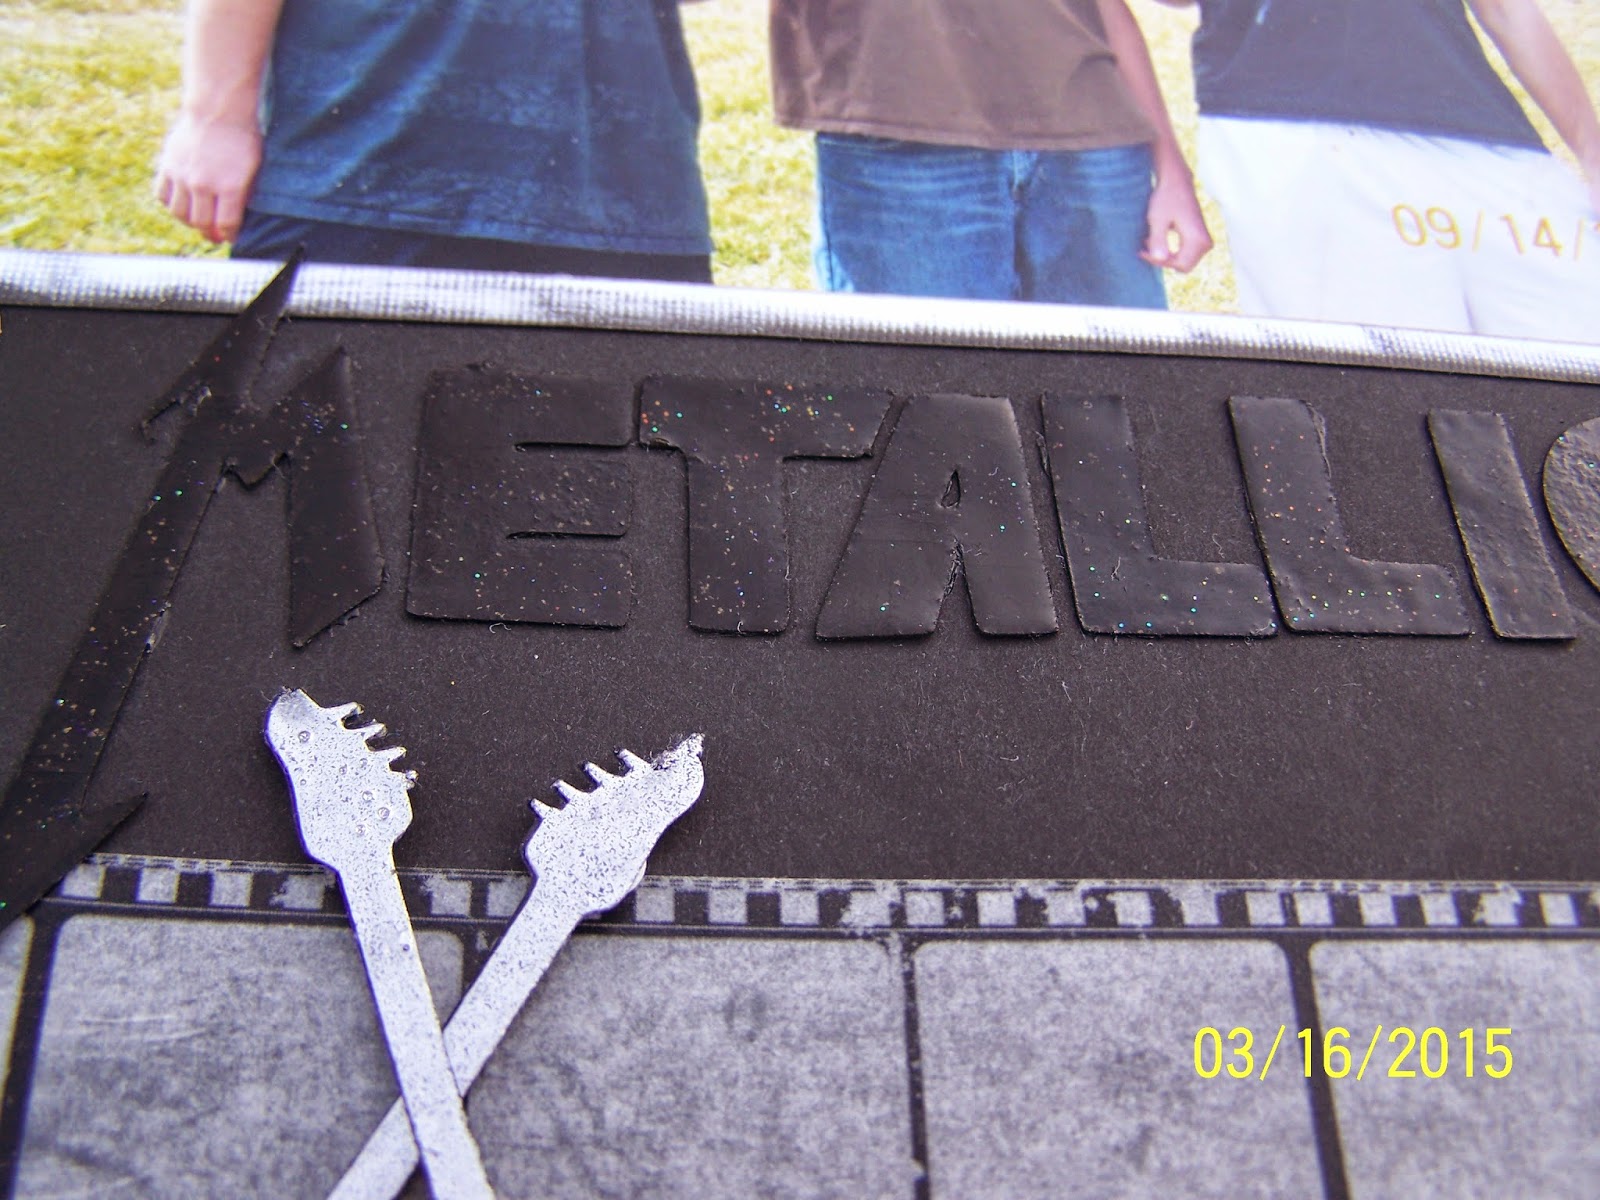
This next layout is the one started and finished in one day.
I knew this was the photo I wanted to scrap next but wasn't really sure what
direction to go in. I was browsing scrapbook sites/blogs and came across a layout on Little Scraps of Magic and saw THE perfect title...so I copied the title from a layout there and I'll link that. You may remember I linked to her blog in an earlier post as well. She is extremely talented and very artistic with her layouts.

Debbi Tehrani blog Little Scraps of Magic

And here is my layout...

After seeing her title, I copied it the way I wanted it using a font
called Hollywood Hills and sizing it to my liking with SCAL2 and my Expression.
The glasses were cut with SCAL2 software and my Expression.
I found the image free online.
The orange bakers twine is made by The Paper Studio

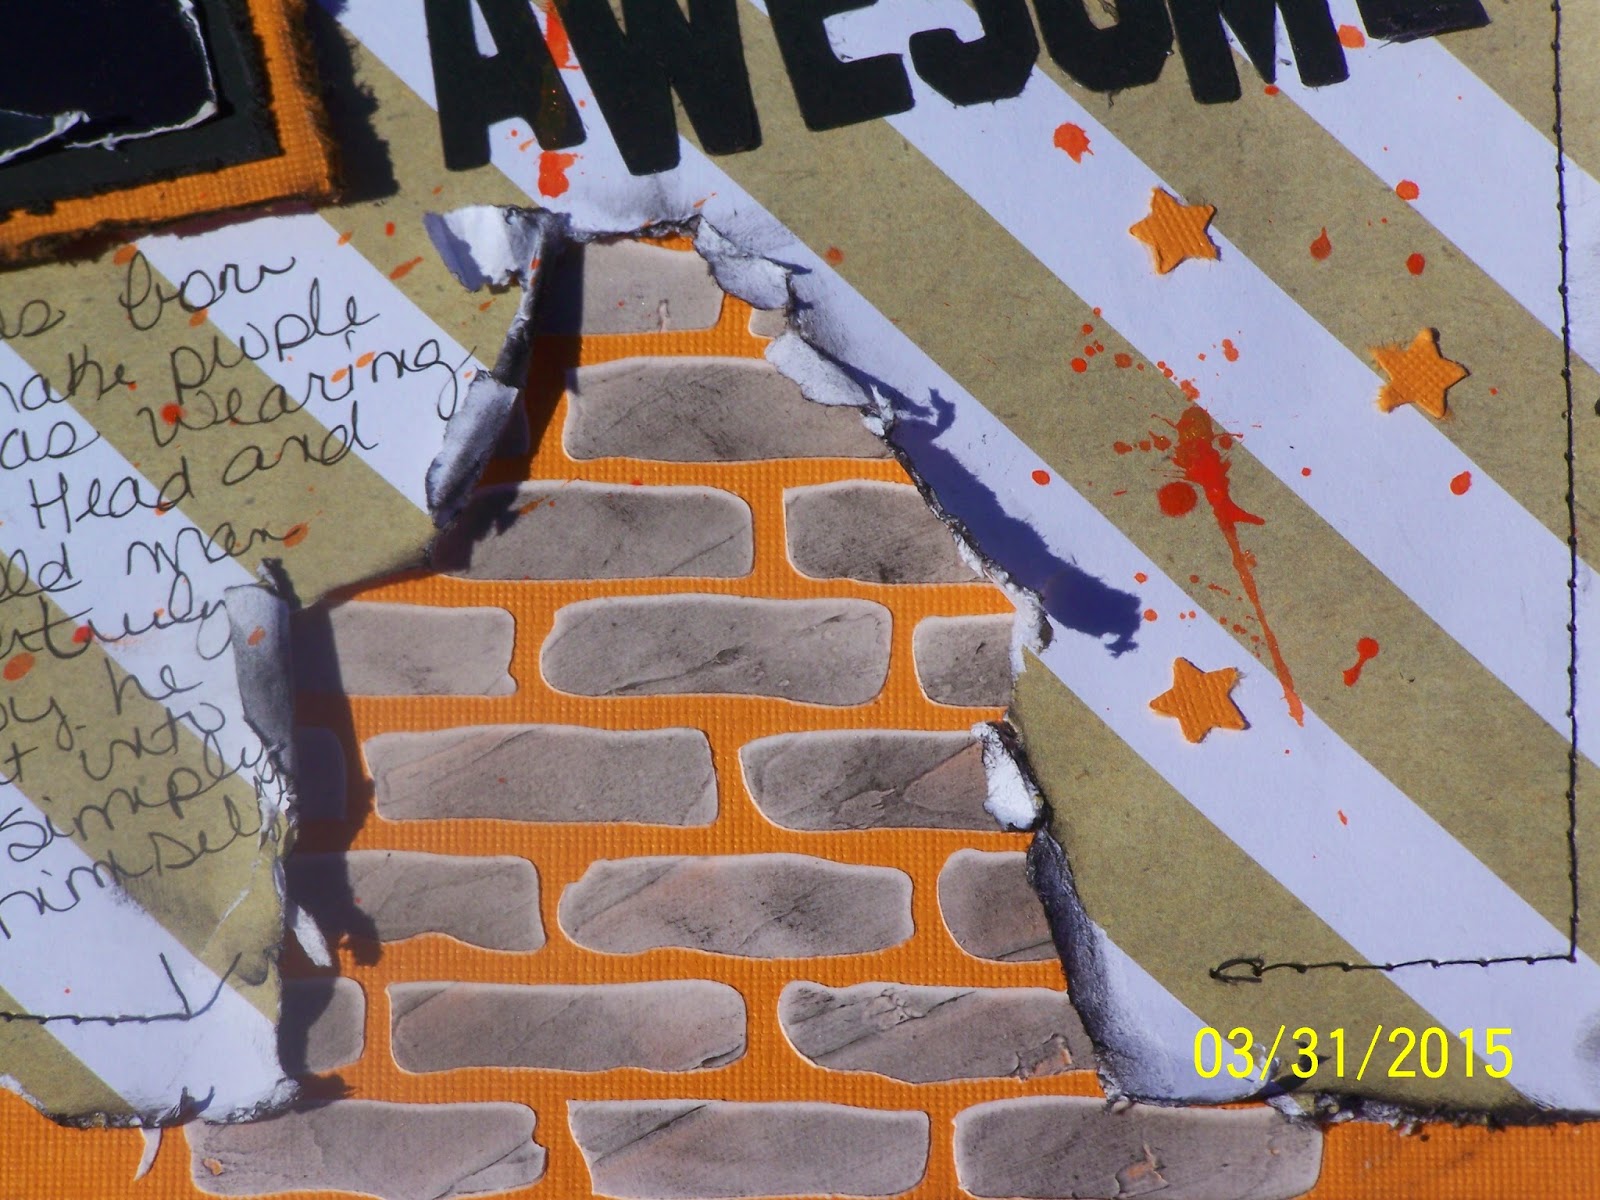
In case you haven't noticed, using texture paste and stencils is my
new favorite technique lol...I was dying to use this brick wall
template from The Crafter's Workshop and I wasn't disappointed.
If you haven't tried this technique...DO IT! You will love it..
so much texture and dimension without being in the least bit bulky.
I used a black chalk ink to color the "bricks" after the paste had dried.

The ink splatters were created using orange Smooch spritz.
I've gotten to where I do so much distressing on my layouts (because I LOVE it) that I decided, after much deliberation,  to invest in the Zutter Distrezz It All by Donna Salazar. You can find it for about $40 if you check around...I got V3 from Amazon. I can't wait for it to arrive--I'll spend SO much less time distressing by hand.

And that's all I have for today but as always, check back soon!

I'm off to start a new layout--Happy Scrapping!!

Rhonda

Monday, March 30, 2015

My Conway Twitty post

I have a lot of random thoughts floating around in my head today so you might want to prepare yourself :)
I don't have anything crafty to share today although I do have a completed layout to share later as well as one I've started but is still lying on my desk...that will hopefully get at least close to completed at some point today.
It's spring break for us and for the past few weeks I've been keeping a mental "to do during spring break" list. I think though that my mental stamina is going to far outweigh my physical stamina lol. Long "to do" lists and I don't generally reconcile well due to lack of motivation on my part.
The major things I wanted to accomplish this week are painting my youngest's bedroom, getting all the carpets cleaned and doing some cleaning outside where my husband tends to pile junk (yes, I mean JUNK) around the outside storage building.
I also planned to scrapbook a LOT.

Mentally, I'm just not where I need to be in order to be productive. Last week...well, last week was a difficult week. In all honesty, I'm still reeling inside and having an extremely difficult time staying focused and on task in whatever I'm doing. I had my heart broken, my entire world shaken and I'm still struggling to come to terms with the heartache. I can honestly say that I now completely understand the statement "it rocked my world" because my world was definitely rocked.
But, I'm putting a lot of effort into not to dwelling as I try to climb back onto the proverbial horse.

And it was in that spirit that I decided, on a whim, that I wanted to take a trip to Nashville/Hendersonville TN and visit the home and burial site of my ALL TIME favorite singer, Conway Twitty. I've longed to go for so so long and it just kept getting pushed aside and replaced with other people's needs...it just wasn't a priority. Garrett decided to make the trip with me and we got up on Saturday and packed an overnight bag and headed out. The closer we got, the more butterflies I got in my tummy. Yes, I know that's corny lol...but seriously, I LOVE(D) Conway Twitty. Looking back, I'm not really certain when I became so enamored with him and his music. For as long as I can remember, I have loved him. No other singer has ever made me feel the way he does. Just the sound of his voice touches me...it's not even so much the songs...it's him.

I, of course, took lots of pictures and am probably going to upload more than I should.  Try not to get irritated with me lol...I do realize Conway Twitty isn't the legend to everyone as he is to me. Feel free to scroll past the photos if you really aren't interested ;)

It was almost a surreal feeling to be standing in this spot
paying my respects to this man who has meant so much to me.
His resting place is very, very unpretentious and I was
a little (ok a LOT) sad that his flowers needed to be replaced.

He's on the far right at the very end on the bottom. I put
an arrow but it's much smaller than I intended.
RIP Conway Twitty <3


After we paid our respects at the cemetery we proceeded to what was
once known as Twitty City, but is now called Trinity Music City. Unfortunately, we were unable to do the house tour because they were closed but I will be going back sometime soon to do that and I can't wait.

Garrett took a lot of photos while we were there and he got
some odd angles. The sun was just at the point where it was really
hard to get a picture with no glare. I have some pretty cool ones with
sunbeams


A permanent memorial to Conway on the grounds

My son, Garrett and I 


This was Conway's home

This photo was actually taken through the glass


Outside gate with the "T" and the music notes
I saw Conway Twitty in concert a couple of times as a teenager in the early/mid 80's and I can remember sitting in the audience and listening to him sing his heart out and the tears running down my face. And, again, I don't know why he affects me like that but he always has. I will forever be humbled by this man and his music. I'm sure he's still performing in heaven and I look forward to hearing him again someday

You can be sure these photos will be popping up in a scrapbook layout sometime soon :)

I actually had a couple other things I wanted to touch upon but I will leave those for another day as I've rambled on a bit with this post.
Be sure and do check back soon as I will have some layouts to share :)
And, as always, thank you, thank you, thank you for stopping by and taking time to read my blog :)
Have a great day!

Rhonda

Sunday, March 22, 2015

Spring has arrived...finally!

Yesterday was the first day of spring and what a perfect first day of spring it was! The sun was shining and it was warm enough to have the doors and windows open...and who could possibly ask for more!

It's been a lazy weekend for me in that I haven't left the house since I came home from work on Friday afternoon. But, it hasn't all been spent basking in the laziness of watching Buffy the Vampire Slayer and scrapbooking lol. Nope, I actually spent all day yesterday with my 2 year old grandson...and if you're familiar with 2 year olds then you know there's not a lot of laziness involved in their care.
Today I've managed to get several loads of laundry taken care of and as a result you can actually see the hamper in my bathroom again haha.
 And amid the babysitting, Buffy and laundry, I did manage to finish a couple of scrapbook layouts that I want to share.

This first layout is my 2nd son's girlfriend and her daughter. Danielle has been a blessing in mine and my families lives and I am so thankful for her. She is beautiful inside and out and even more important is the fact that she loves my son. Also mustn't forget that she brought a granddaughter into our lives who is just as beautiful as her Mama.

I took some acrylic paint in a dark metallic pink and used a sponge brush to create a little color across the light pink cardstock I used as the base for my layout.

I like taking photos of my layouts rather than
scanning them but sometimes it's difficult to get them
cropped perfectly.
I used a Bazzill jewel template to create the swirl using
Ranger liquid pearls.
The gold glittered lettering is Thickers that I've had for
several years...I wasn't sure that they would work on this
layout but I am not disappointed.
The small letter stickers came in an assorted pack that
I picked up from Hobby Lobby where the Snap pocket page
products are located.
The pennants were punched and sewn on.

I used the texture paste and a stencil to create the hexagons
in the background. I mixed some pink paint with the texture paste
itself to lend color and dimension to the layout. Once the texture paste
was dry I used Perfect Pearls powder to add a little shimmer to the
hexagons.
The rainbow/clouds were cut from a piece of one of the patterned papers I
used. I added some diamond stickles to the clouds, again for sparkle
and dimension.

Flowers were created using a couple of flower punches,
some diamond Stickles and a few brads in coordinating
colors.

I tend to gravitate toward distressing my papers as
witnessed again with this layout...lots of edge distressing
and inking.

The stickers used throughout this layout were from different collections and
I'm not sure of the manufacturers.

And the second layout I want to show you today has a little different subject matter and I hope that no one is offended...I do apologize in advance, just in case.

Remember that you can click on the individual pictures and see a little more detail :)
This is one of those layouts that the photo just won't do justice to...it's frustrating but not unexpected.


Lots going on in this layout as well...more edge distressing
and sewing...also the hinges which look better in person. I
was only able to find hinges in brass so I used Tim Holtz
alcohol ink to add some color and tone down the brass.
The large snowflake has been in my stash for years and I
believe it is a Paper Studio product.
                         

This is a view of the layout opened to reveal several more
photos hidden in a pocket behind the original front
photo. 
The snowflakes to the right of the main photo were punched
with a Martha Stewart snowflake punch. I used the same
embossing powders on these as with the title. I then used
popdots to raise them from the page, adding dimension to the layout.
For the "snowbanks" I created underneath the photo and title
I used a combination of the Stampendous aged teal powder
and Stampendous shaved ice flakes. I heated the powder until
it was almost completely melted and then dropped some flakes
down onto the area and zapped them with the heat gun. This
is certainly *not* a precise feat due to the fact that the flakes
are extremely light and try to fly away in all directions. Just drop
down a few more than you want because some will get away and I
wasn't able to find a way around it. It takes a few seconds for the
heat gun to grab the flakes and begin the melting process and it's
in those seconds that you will lose some stray flakes. It was well
worth the effort though because it looks absolutely gorgeous
in person and I wish you all could see it. GO. BUY. THIS. POWDER.
Seriously, lol. I found it on Ebay for around $7 and it was money
well spent. I may go buy another just in case lol. 
I used Ranger Holographic embossing powder on the white letters
of the title. I don't think the true color comes through in the photos. For the
"o" I used Stampendous aged teal embossing powder. I can't even
begin to express how in love I am with this embossing powder. I
would highly recommend it to every scrapbooker, stamper and crafter.
It's absolutely stunning!
Across the edges of the "snow banks" I used liquid applique to
create a snow effect. You just put a thin line of applique and use the
heat gun on it until it just starts to bubble. You can see on the left
side of this photo that I kept the heat gun on this area just a second
or two too long (it's got a teensy area that looks toasted)
I also used the liquid applique to create dots of snow along the left side
of the main photo.

I know I tend to ramble on with my descriptions of the layouts and I realize it can seem monotonous but I try to give as much detail as possible in case someone
happens along and wonders about the details.

I'm so thankful that after all these years I haven't lost my love of scrapbooking. Sometimes I may go weeks without creating anything but my love for the hobby has never wavered.
I only hope that I can play a part in motivating and inspiring others :)

Thank you for coming by and don't forget to come back soon!

Rhonda


Monday, March 16, 2015

New layouts to share

I spent some time taking pictures of the layouts I've finished the last week or two and I'm ready to share those with you guys.
As I said in my last post, I have been in somewhat of a creative slump and I really struggled with a couple of these layouts.
I've had the photos for this first layout in the "to scrap" box for a few years and just never felt any inspiration to scrap them. I don't feel that this is one of my better layouts but I'm happy to have the pictures out of the box and onto a layout.
I actually dug my sewing machine out of the closet for this page--I don't think that machine has been out of the box in about 20 years! I was never very good at sewing anyway, hence the reason the machine has been in the closet for 20 years lol. But I spent a couple hours cleaning it up and trying to remember how to thread the crazy thing and was finally able to produce a usable stitch. My motivation in using the machine was the fact that it takes so long to stitch around the border of a layout by hand. And since a straight stitch is the only stitch I'm even remotely proficient in (using the term "proficient" may be a slight stretch lol), I had high hopes. I'm still learning but it was faster than hand stitching and I'm satisfied with the result of the machine sewing.
The "tickets" on the far left are actually pictures I took
of the actual tickets. I just had them printed and cut them out.
The ticket at the bottom is actually one of the
tickets. I can't recall which one of the boys brought it home.
I also used vellum for the first time in AGES!
And you can't tell but I also used Goosebumps texture spray
on this layout.
I cut the title using my SCAL2 software and my Expression.
I then heat embossed with black embossing powder. After the
third layer of embossing I flicked some Ranger diamond glitter
onto the letters and then reheated each letter. If you click on
the photo you can see the pretty sparkle to the letters.

I used the same technique here as with the title. Sadly,
I have no idea what this symbol really is or what it means LOL.
It came up over and over again when I did a Google search
for "Metallica symbol" so I figured it'd work--Especially
considering I'm not a Metallica fan and was completely clueless as
to how to embellish this page.

I cut the guitars with the SCAL2 as well. I cut two layers and
cut the bottom layer as a solid piece so that the black would show through.
I then heat embossed the top layer with silver
embossing powder. These really turned out well.
I've really been trying to make an effort to use more of my older supplies. I think it's important to use them in order to justify the new supplies I keep buying--Plus the fact that it frees up space for new supplies LOL.
In the process of using my older supplies I have rekindled my love of embossing. It's one of those things that simply fascinated me in the beginning of my scrapbook obsession but that fell by the wayside somewhere along the way. For awhile I'd still use embossing when making cards but eventually, even that sputtered to an end (as did my card making lol). But over the last couple weeks I've purchased several new colors of embossing powder and I'm hoping to keep the love alive for a good long while. So much versatility in those little bottles of powdery yumminess!

But, moving along---this next layout is another that I struggled with and to be honest, I'm really not happy with, but unless some lightning bolt of creativity hits me then I'm calling it finished.

nothing spectacular here, but it's a memory preserved.
Brads are another supply I have an abundance of but rarely use...
I'm making a concerted effort to use them more often. And why
wouldn't I??? Those things are great!


And here is my 3rd layout...which I also struggled with. Actually, I felt as though I failed to do justice to the photo which I absolutely love beyond words of my husband and our granddaughter taken this past 4th of July. Looking at it now, I would say that I'm more satisfied rather than happy with the end result. This page felt forced from the get-go and I have no idea why. Unfortunately, the harder I tried the more forced it felt. I reached a point with this particular layout where it felt more like a chore than something I do because I love it...it's suppose to relieve my stress not create it. Eventually, I was tired of looking at it on my desk and called it done.

*first let me say that the red paper with the blue stars is actually
STRAIGHT even though the way the photo is cropped causes
it to appear very crooked.

I used the paintbrush paint splatter method for this page. Plain red and blue
acrylic paint mixed with a little water to thin each one. Just dip your toothbrush into
the paint, hold it close to your paper toward the direction you want the paint
to splatter and pull your finger firmly from the front of the toothbrush to the back,
allowing the paint to splatter across the paper. This is not a precise process so
be sure and protect your clothing as well as anything around where you're splattering the paint.
For the title I used my SCAL2 software and my Cricut Expression 2.
I also created a handsewn border around the edge of the white
paint splattered cardstock.
I created this little "Uncle Sam" paper piecing from
an image I found online. He's pretty cute, even if I do
say so myself lol. And the stickles were just the perfect
touch :)
I used a sparkly embossing powder on the stars...and then
popdotted them on. The Pinwheels are by Pebble and I got those
from sb.com. I had originally planned on making my own pinwheels
but when I saw these for such a great price I had to get them. I added
some diamond stickles to the small stars on the pinwheels.
A few sequins scattered about are my new go-to embellishment
and I love them on this layout in particular.
I have one final layout to share and it's one I actually like...that *may*, however,  have a little something to do with the subject. It certainly wasn't a chore to look at this sweet smile all day as I worked on this page :)

I used a brand spanking new (to me) technique and I love the effect! I got some
texture paste a few months back with the intent of using it on a canvas I want to paint for my bedroom. But when I saw it being used on scrapbook layouts I knew I had to give it a go. I used a Tim Holtz stencil...I can't remember the name but possible fading circles or dots?? Anyway, the paste works like a dream and dries quickly. I sprayed some red Maya Road mist directly onto the dried paste as well as some diluted teal acrylic paint I dropped onto the page. Love, Love, LOVE this stuff and I will definitely be using more of it!


Just how incredible adorable is this little cutie???
Here you can see more of the effect of using the texture paste
directly on the paper. It really is fabulous--if you don't have any, GET SOME, lol. 
This is actually also texture paste. I used a stencil embellishment
to create the "love you" here and once dry I added some stickles
for a little touch of sparkle. 

doilie from the Dollar store and some misc. embellishments.
I covered the wood veneer "perfect" chat bubble with acrylic
paint to match the layout.

And the title as usual was cut with SCAL2 and my Expression2.

I realize this probably seems like the post that was never going to end lol, and I apologize if I've rambled. That's all I have to share for today but I came across a sketch in the scrapbook.com gallery I'm dying to try my hand at so be sure you check back soon!
If you made it this far through this post, then THANK YOU! Have a great day and happy scrapping!

Rhonda

Sunday, March 15, 2015

In a slump

I suppose it's a combination of things that have caused the "slump" I've found myself in recently. It has been so wet and yucky weather-wise that it's difficult to maintain a positive outlook.
I have, however, been doing some splurging on new scrapbook supplies and that's ALWAYS fun. I've ordered from scrapbook.com a couple times the last few weeks as well as once from Joann.com. On top of that, I've made 3 separate trips to Knoxville to shop at Joann's physically. And maybe a couple of small visits to Hobby Lobby. Wow, LOL, I think that might sound a little worse than it actually is.
I wish I'd taken more pictures of my "happy mail" but as usual, I forgot. I did get this photo though of a package from sb.com a couple weeks ago (proving that I have good intentions of blogging haha)...lots of yumminess in this picture and a couple of the items have already been put to use :)


And, even though I've been in somewhat of a creative slump, I actually have been doing a little scrapping and I will be posting several layouts sometime this next week.

The weather was beautiful here today--SUNNY and around 70*---doesn't get much more perfect than that. Hopefully the nice weather will stick around for a week or two so we can recover from the winter blahs.

I hate to blog on the fly but it's been a long day and this old country girl is tired and has an alarm that sounds at 4:50 a.m. So on that note, I'll take my leave...but be sure you check back sometime this week for a look at the layouts I will be posting :)

Thanks for stopping by and hope to see you again soon!
Rhonda