The blue trim on my counters has been on my list of things that needed replacing since the first time we walked into this trailer. WHY would any person think blue trim on countertops would be a good idea?? The counters themselves were in great shape other than a couple little things and so replacing the counters has never been a priority with my husband. His thought process and mine are completely different when it comes to home improvement. He would have been content to look at those blue and white counters for the rest of our lives and it would have never occurred to him to replace them. Sometimes I feel like nothing would ever be updated or fixed in our home if I didn't hound him. Knowing my husband the way that I do, and trust me, I do lol...I knew there was no way he'd be on board for new counters. So I started the research process to see what my options were and I was thrilled when I discovered that painting the counters was an extremely viable and affordable option. I broached the subject with him and he shot me down. Over and over he shot me down and I was beginning to get very discouraged. He just wasn't convinced that painting was a good option and "there was nothing wrong with the counters".
Let's just say that I'm a pretty decent contender when it comes to the hounding department and eventually I convinced him to at least watch a couple of the many YouTube videos relating to painting laminate counters.
After he watched the process and saw the results, he finally agreed that we could give it a try. I was super excited and we took off to Walmart for the supplies immediately lol.
I don't have any photos of the supplies we used but I will try to add one later. I can't get a photo at the moment because I have a sleeping 2 year old in my bed and I definitely am not ready to wake that particular sleeping dragon lol. I'd rather face a grizzly bear than a 2 year old woken up from a nap too soon.
The first step in the process of painting the counters was sanding them just a little and then cleaning them very very well. We used mineral spirits for the final cleaning before the primer went on. Once the counters are completely clean and dry you can start painting on the primer.
I'm going to share with you just a few of the photos I took before, during and after our painting.
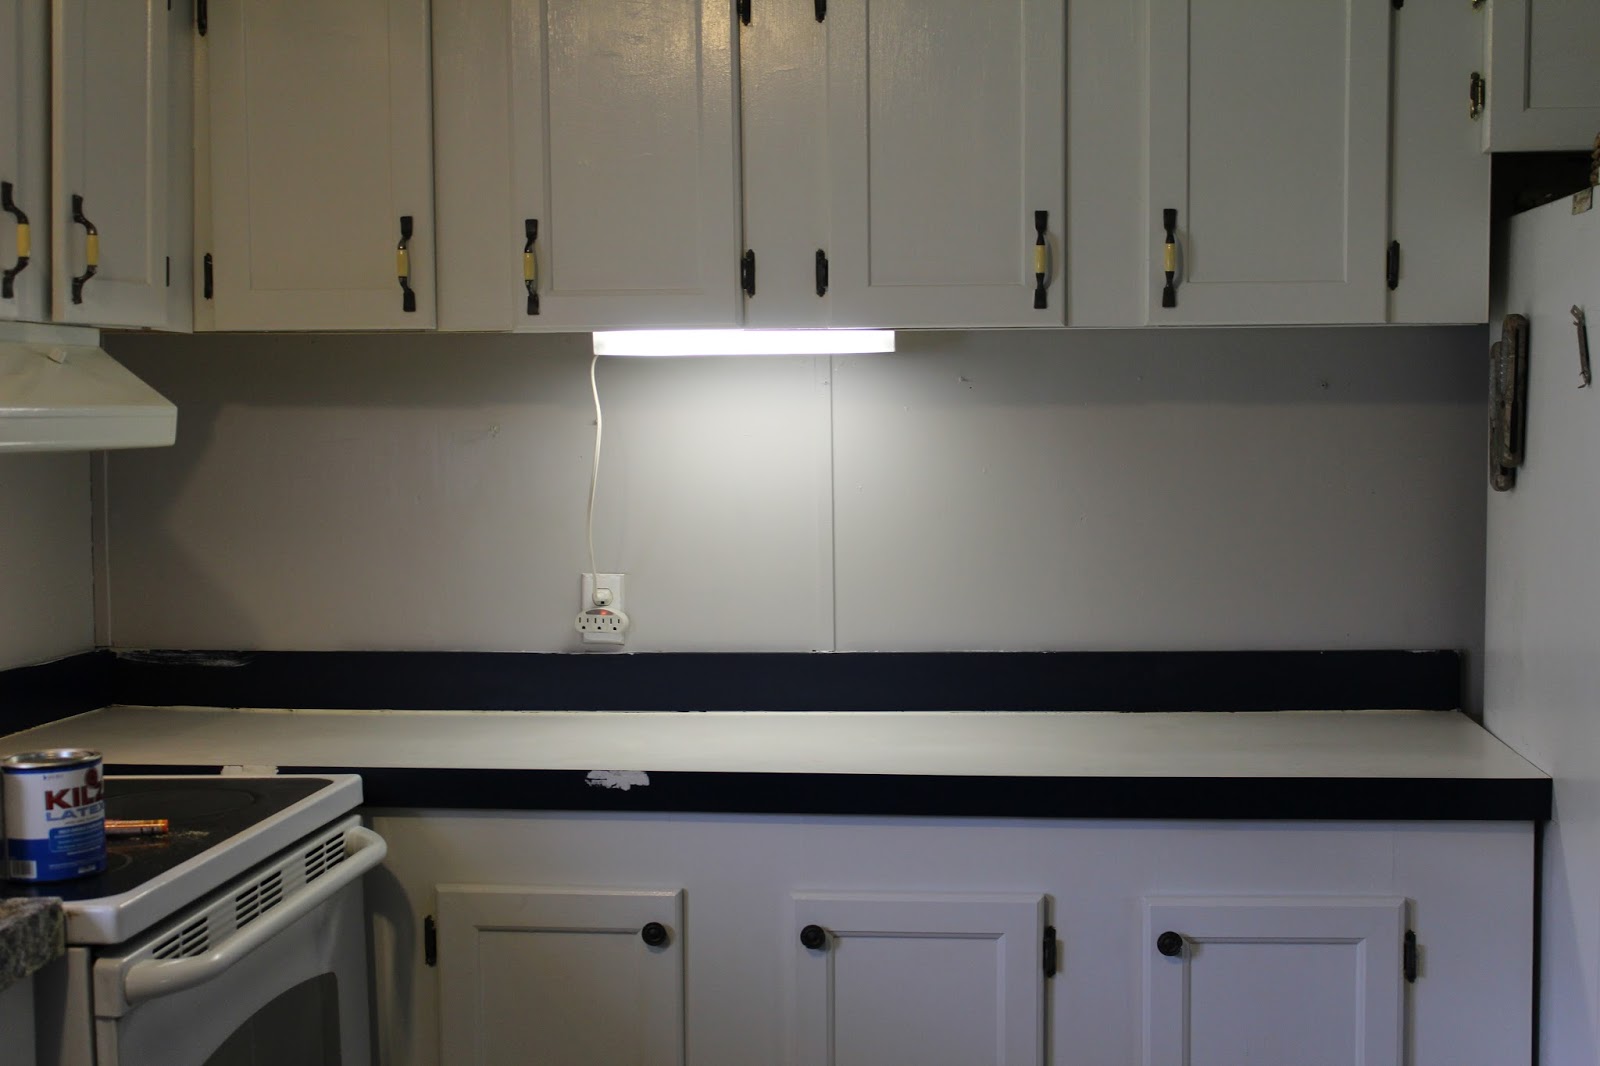 |
| Here is the *before* picture...You may notice that we also painted the cabinets white and the wall a light gray :) |
 |
| That's my youngest helping out with the sanding |
 |
| first coat of primer |
 |
| after 2nd coat of primer |
 |
| This is after the first layer of paint was applied using a sea sponge |
 |
| This is after about 6 layers of paint and immediately before the polyurethane process |
 |
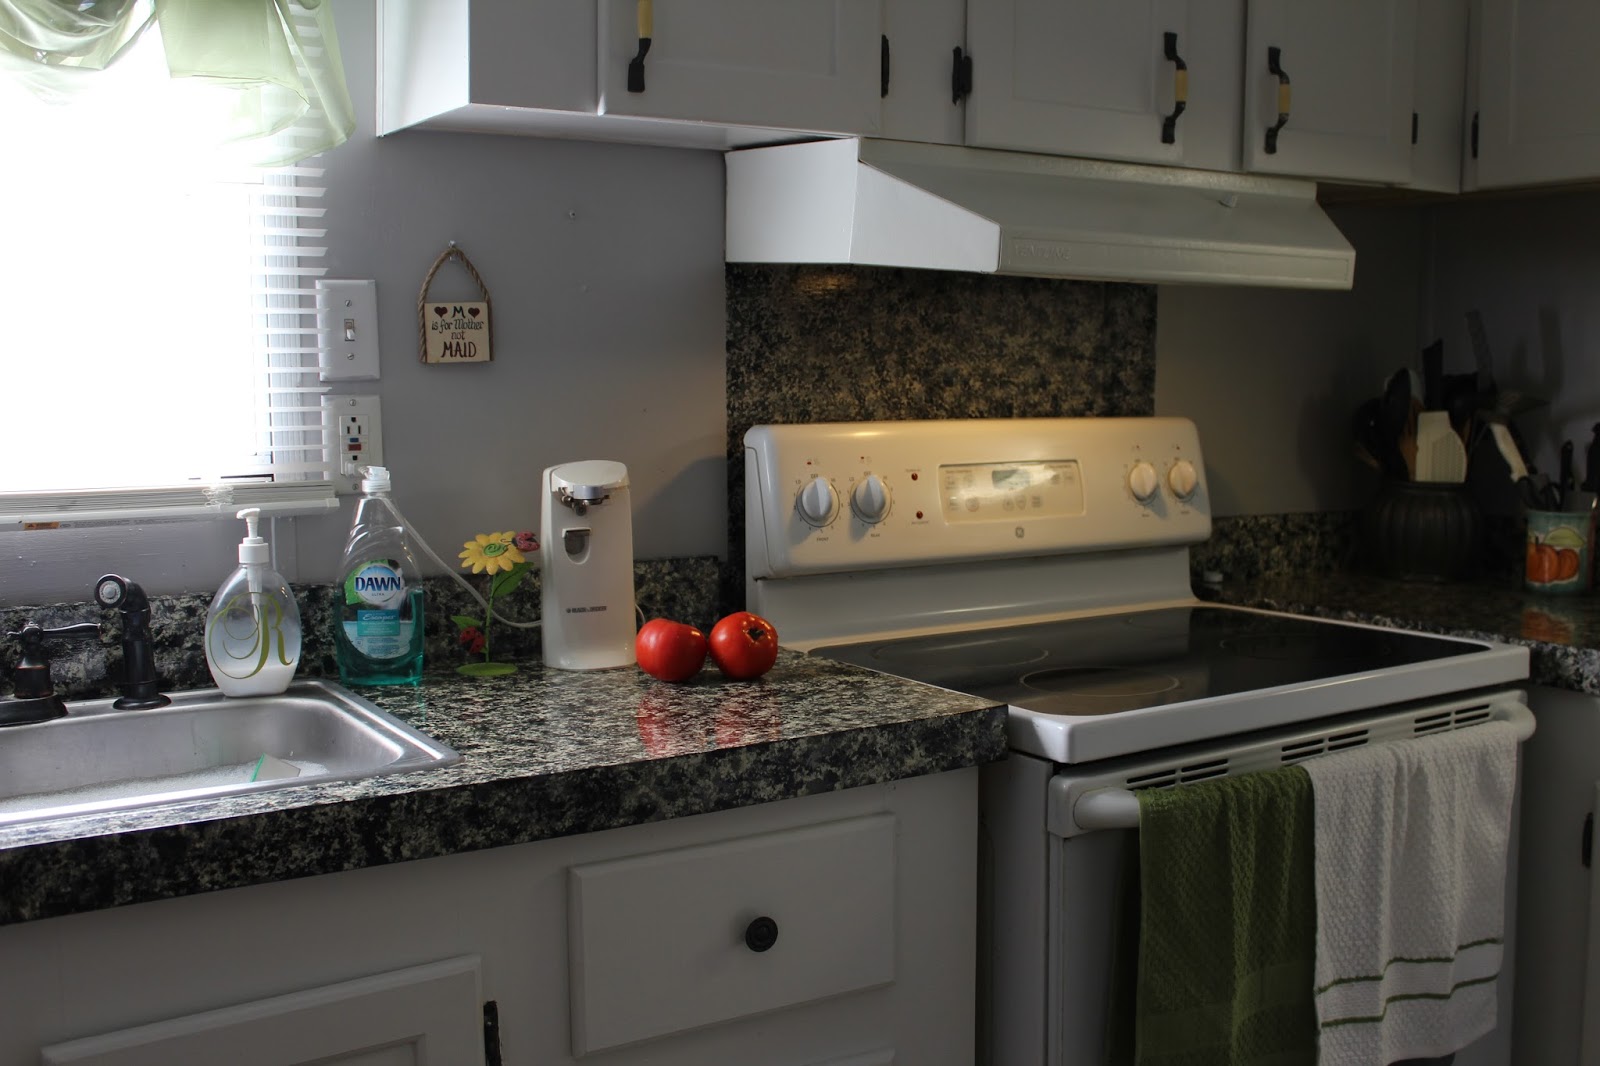
| This is a close up of the finished counter...the part that use to be blue...how much better is this??? |
 |
| another close up of the finished counter |


 |
| You may notice my "faux backsplash" behind the stove... not sure if that is staying or if I'll decide to sand it down and paint over it. I'm not sold on it but I'm also lazy lol |
 |
| nighttime view |

 |
| all tape removed and everything in place |
 |
| Look how pretty and shiny! |

And that's it...I absolutely love my "new" kitchen and especially the counters. Obviously, I can't speak as to the durability but I've read lots of good things and as long as we take care with them there should be no issues.
I can tell you that although the painting process was very simple it was also quite tedious. I actually practiced on a small area of the countertop itself before washing the away the paint and starting the sanding. I did that to get an idea for the look I wanted to achieve and also to reassure myself that I wasn't biting off more than I could chew.
We sealed with about 5 coats of polyurethane clear coat...I let my handy husband take care of that part because you don't want any inconsistencies or bubbles if you can help it. He first tried rolling on the topcoat but then decided to use a brush. It's not as smooth a surface as actual granite but it looks beautiful and it completely changed the look of our kitchen...and the total cost was under $40...now come on...how cost effective is that???
I'm sure this isn't something that everyone will feel comfortable attempting but if you're one of those folks who is considering painting your countertops then I say why not give it a try :)
One other thing I'd like to add is that there actually are products out there specifically made for this and you can google those. One of the products I came across during my research for this project is called Giani and they sell that in home improvement and hardware stores. I'm also pretty sure that Rustoleum has a similar product so if you would rather go that route then you will still find this very affordable. When I priced the Giani it was around $80 for the kit...not a bad price at all.
If you do decide to do this then be prepared to have your kitchen practically unusable for a few days...that was the most difficult part of the entire process for us.
I think that's it for this time...I hope you enjoyed my post and seeing my "new" kitchen. If you have any questions then please let me know.
Until next time, thanks for stopping to read and come again soon!
Rhonda
My partner and i are not able to think that countertop can be colored! I might include imagined she obtained synthetic corian countertops! I love everything relating to this kitchen area! Fantastic remodel and for that reason cheap!!
ReplyDeleteGranite Countertops Lynnwood
Thank you for your kind comment! Nobody who sees my countertops can believe they are painted! They still look wonderful and I still love them :)
ReplyDelete